In the modern era of WordPress development, many developers are looking for ways to integrate React with WordPress to enhance functionality and user experience. Today, we will learn how to create a React-based WordPress plugin step by step. At the end of this guide, you’ll also find a boilerplate ZIP file to help you get started easily.
Step 1: Create the WordPress Plugin Folder
First, navigate to your WordPress plugin directory and create a folder for your new plugin. Inside it, set up the following structure:
hello-react-plugin/
│
├── hello-react-plugin.php
├── src/
│ ├── Main.js (React code)
Next, open the hello-react-plugin folder in a code editor (e.g., VS Code). Open the terminal and run the following command:
npm init -y
Note: Ensure that Node.js is installed on your system. If not, download and install it from here.
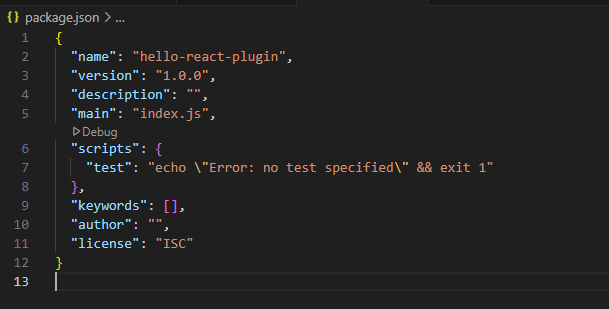
After running the command, a package.json file will be generated in your project directory.
Now, let’s set up the plugin structure inside hello-react-plugin.php to make it ready for installation.
Step 2: Add React to the Plugin
In the terminal, install React and ReactDOM by running:
npm install react react-dom
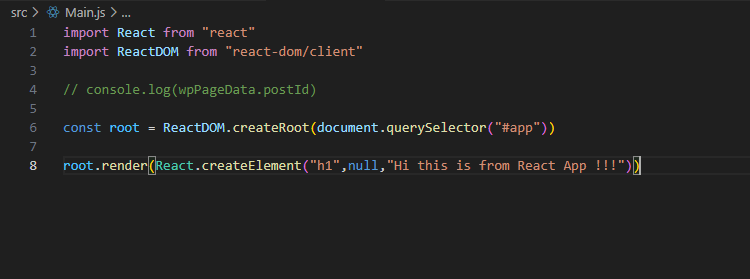
Now, open src/Main.js and write your React code.
Next, install Webpack and necessary dependencies:
npm install webpack webpack-cli webpack-dev-server
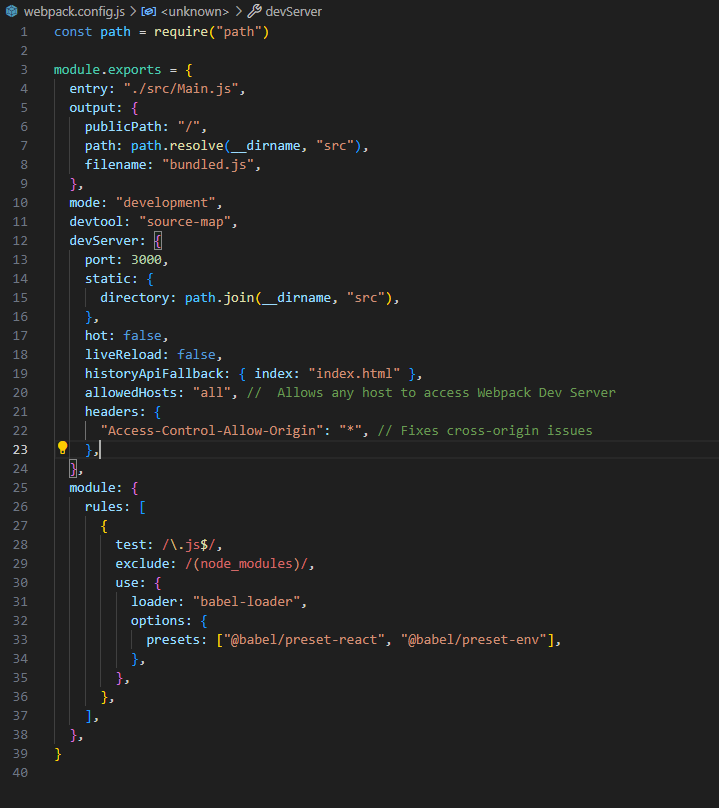
Create a new file webpack.config.js inside the hello-react-plugin folder and add the necessary Webpack configuration. (The full code is included in the ZIP file.)
Now, install Babel to transpile modern JavaScript:
npm install @babel/core @babel/preset-env @babel/preset-react babel-loader
Update the package.json scripts section with the following:
"scripts": {
  "start": "webpack serve --mode development --open",
  "build": "webpack --mode production"
}

Step 3: Enqueue the React Script in WordPress
In your WordPress page, add a container where the React app will be rendered:
<div id="app"></div>
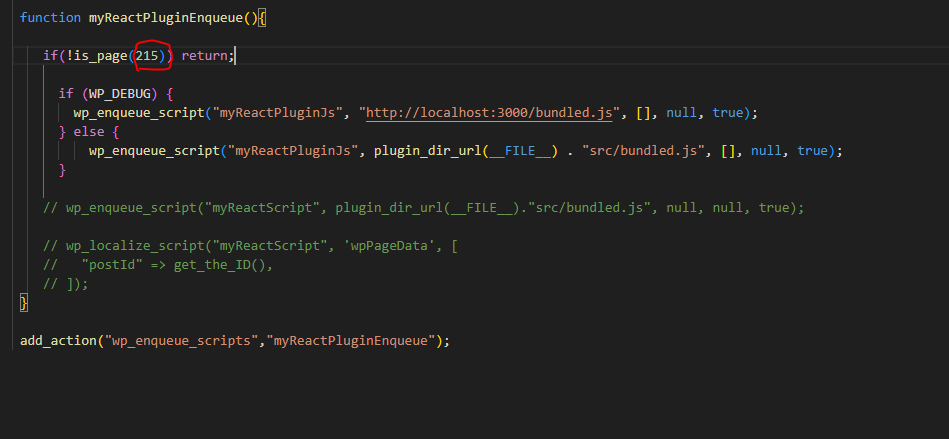
Note: This code should be placed on the WordPress page where you want to display your React component. In the ZIP file, this is placed on a page with ID 215.
Now, in hello-react-plugin.php, enqueue the compiled React script so that it loads properly.
Final Step: Activate the Plugin
Before activating the plugin, build the project using the following command:
npm run build
This will generate a bundled.js file inside the src folder. This file contains the final compiled React code, ready for production.
For development mode, use:
npm run start
This will serve the bundled.js file in memory and make it available at localhost:3000/bundled.js.
🎉 Download the Starter ZIP File
To simplify the setup, download the WordPress React Plugin Boilerplate ZIP file and use it as a starting point for your development.